Table of Contents
Hikvision Setup
Hikvision cameras and recorders typically work out of the box with TetherX. This guide covers additional configuration options and firmware updates.
RTSP URL Format
For Hikvision DVRs/NVRs, use the following RTSP URL format:
rtsp://[user]:[password]@[ip]/streaming/channels/[channel]0[stream]
| Channel | URL Example |
|---|---|
| Camera 1 | rtsp://admin:12345@192.168.1.3/streaming/channels/101 |
| Camera 3 | rtsp://admin:12345@192.168.1.3/streaming/channels/301 |
| Camera 10 | rtsp://admin:12345@192.168.1.3/streaming/channels/1001 |
See Connecting to DVRs and NVRs for general DVR/NVR setup instructions.
Audio Recording
Hikvision cameras with built-in microphones can record audio. See Audio Recording for setup instructions with Hikvision screenshots, encoding settings, and how to disable audio in TetherX.
Enabling Analytics
Configure your Hikvision camera to send motion detection and smart events (intrusion, line crossing, audio detection) to TetherX.
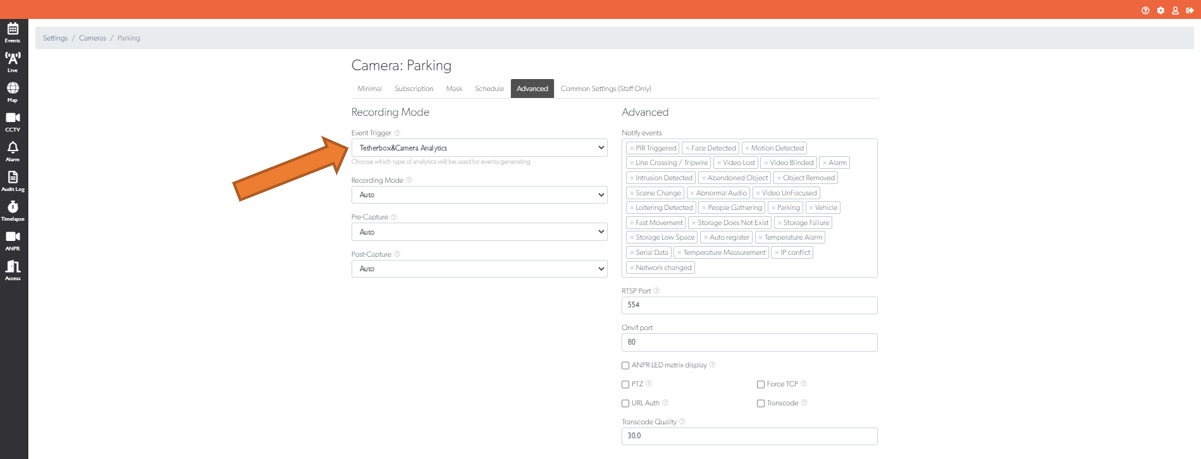
Step 1: Enable Camera Analytics in TetherX
Open the Advanced tab
Set Event Trigger to TetherBox & Camera Analytics
Click Update Camera
Step 2: Access the Camera
Create a tunnel to your Hikvision camera and log in with the admin account.
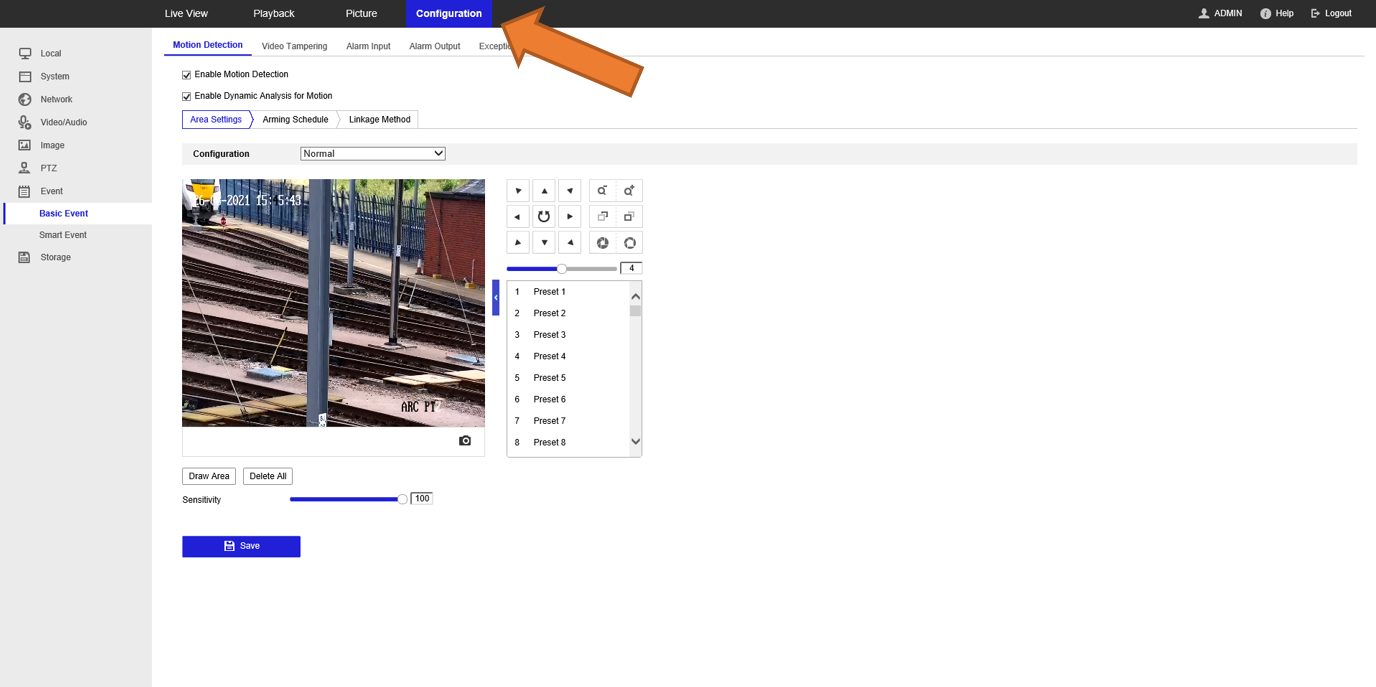
Click Configuration in the top menu.
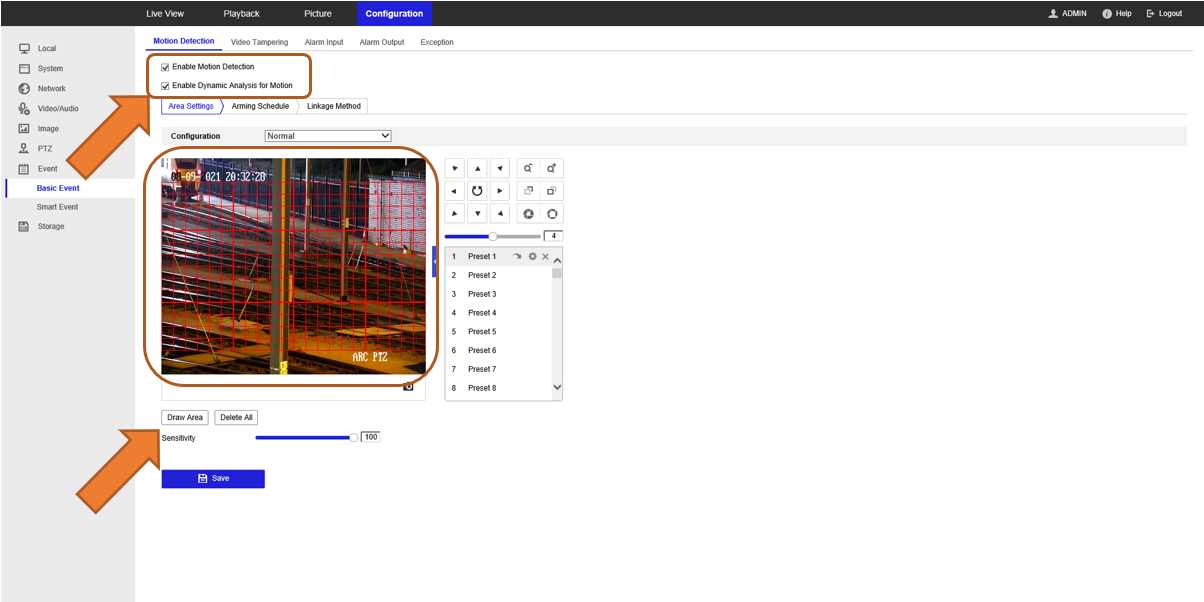
Step 3: Configure Motion Detection
- In the left sidebar, expand Event and select Basic Event

- On the Motion Detection tab, configure the following:
- Enable Enable Motion Detection
- Enable Enable Dynamic Analysis for Motion
- Click Draw Area and use your mouse to select the detection zone
- Click Stop Drawing when finished
- Click Save
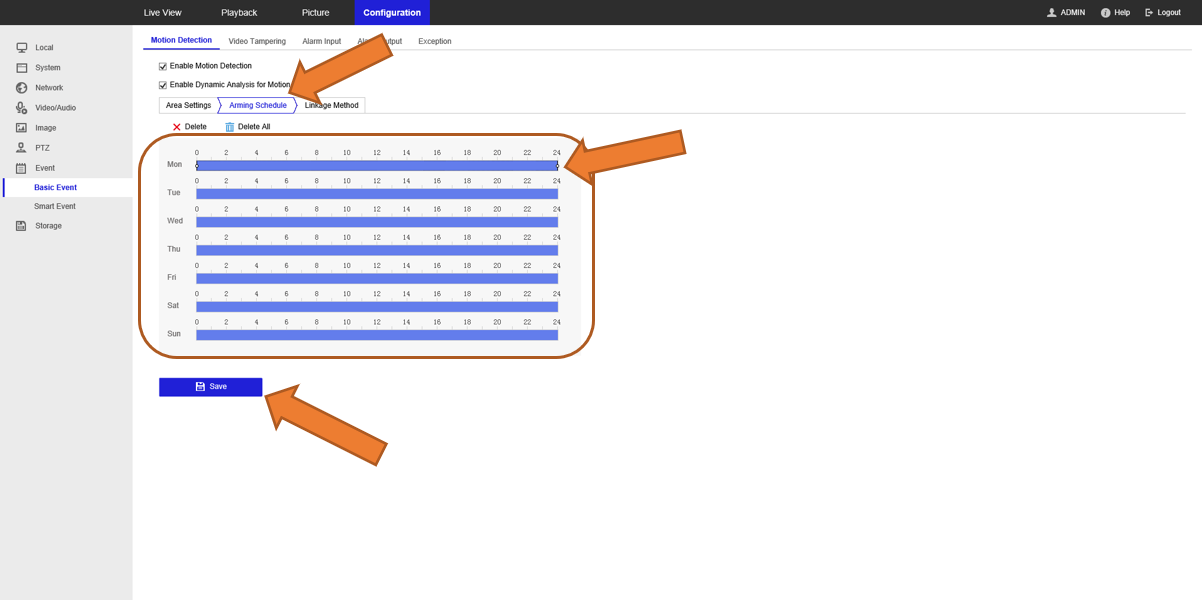
Step 4: Set the Arming Schedule
Select the Arming Schedule tab
Use the blue sliders to set when analytics should be active (days and hours)
Click Save
Step 5: Enable Event Notifications
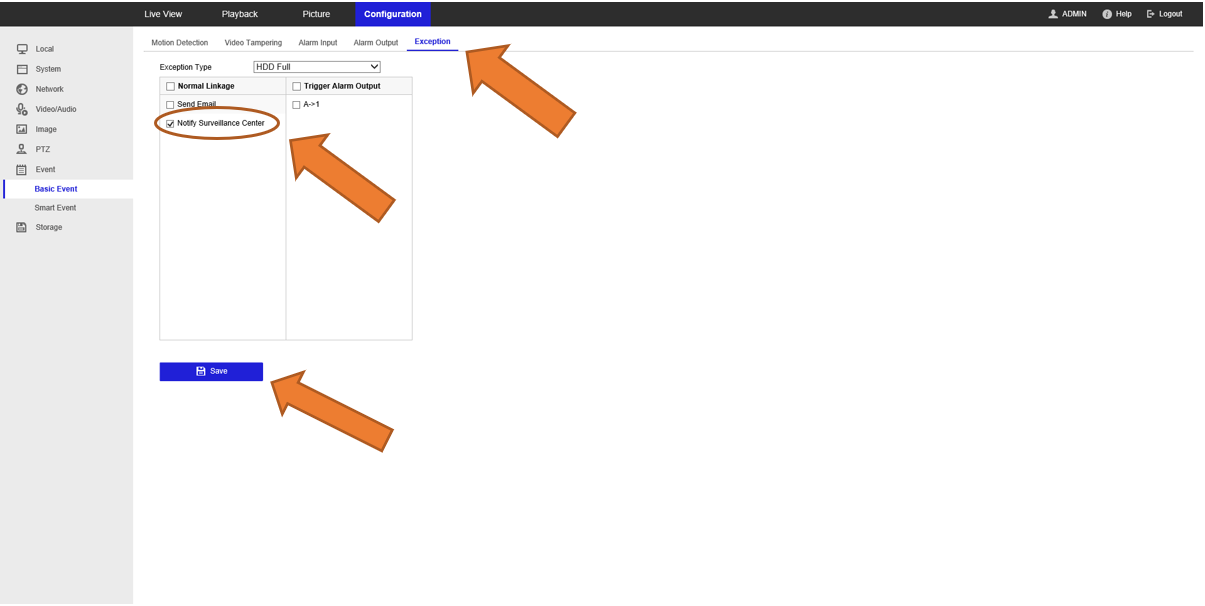
Select the Exception tab
Enable Notify Surveillance Center - this sends events to TetherX
Click Save
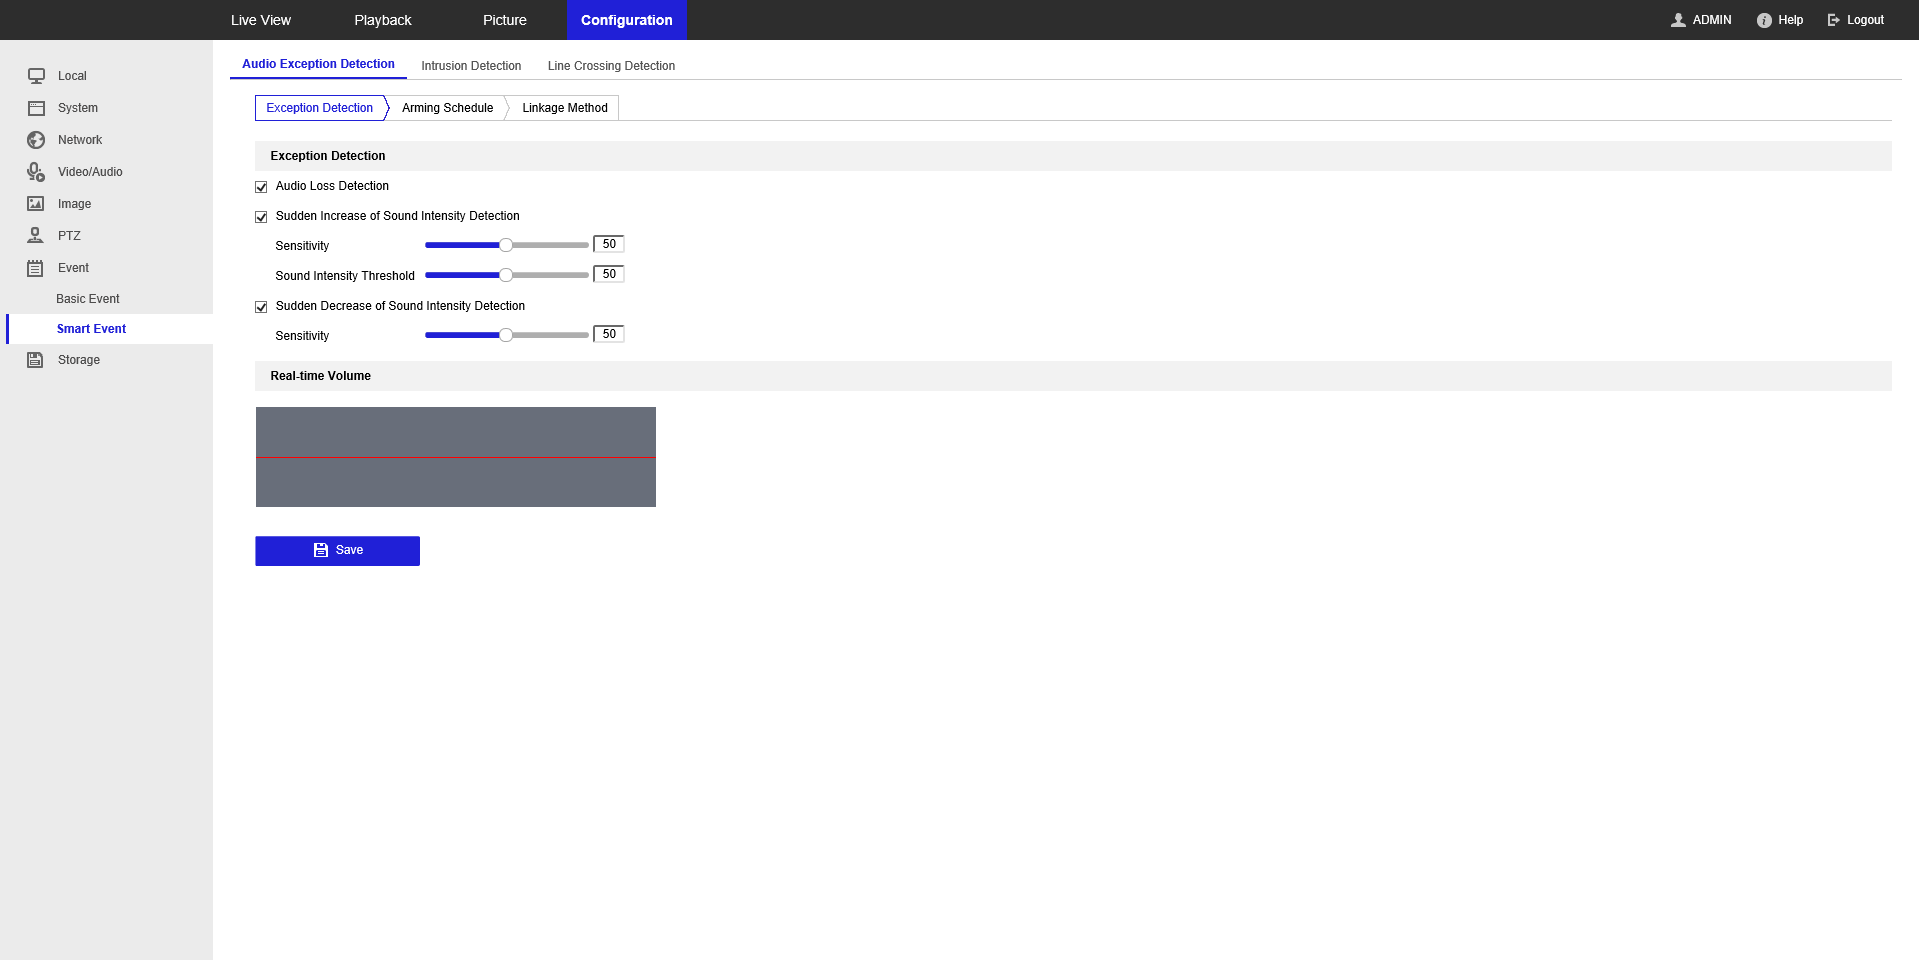
Step 6: Configure Smart Events (Optional)
For cameras with advanced analytics, you can enable additional detection types:
In the left sidebar, select Smart Event
Enable the analytics you want, such as:
- Intrusion Detection - triggers when someone enters a defined area
- Line Crossing Detection - triggers when someone crosses a virtual line
- Audio Exception Detection - triggers on sudden loud noises (useful for quiet areas)
Configure each event type's arming schedule and enable Notify Surveillance Center
Click Save
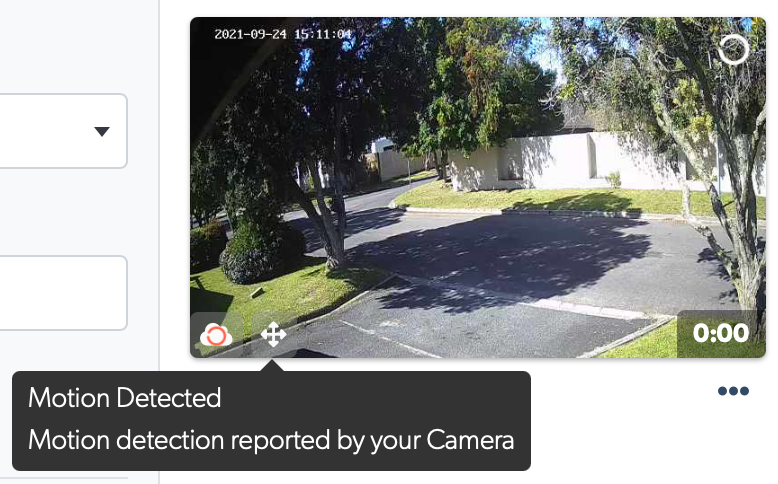
Step 7: Verify Events in TetherX
Log out of the camera and return to the TetherX Events page. You should see events appearing with icons indicating the analytics type detected.
Tip: Use Camera Notification Settings to filter which event types trigger notifications and which should be ignored.
Using TetherX with Hik-Connect
Yes, you can use TetherX alongside Hik-Connect on your Hikvision cameras and recorders.
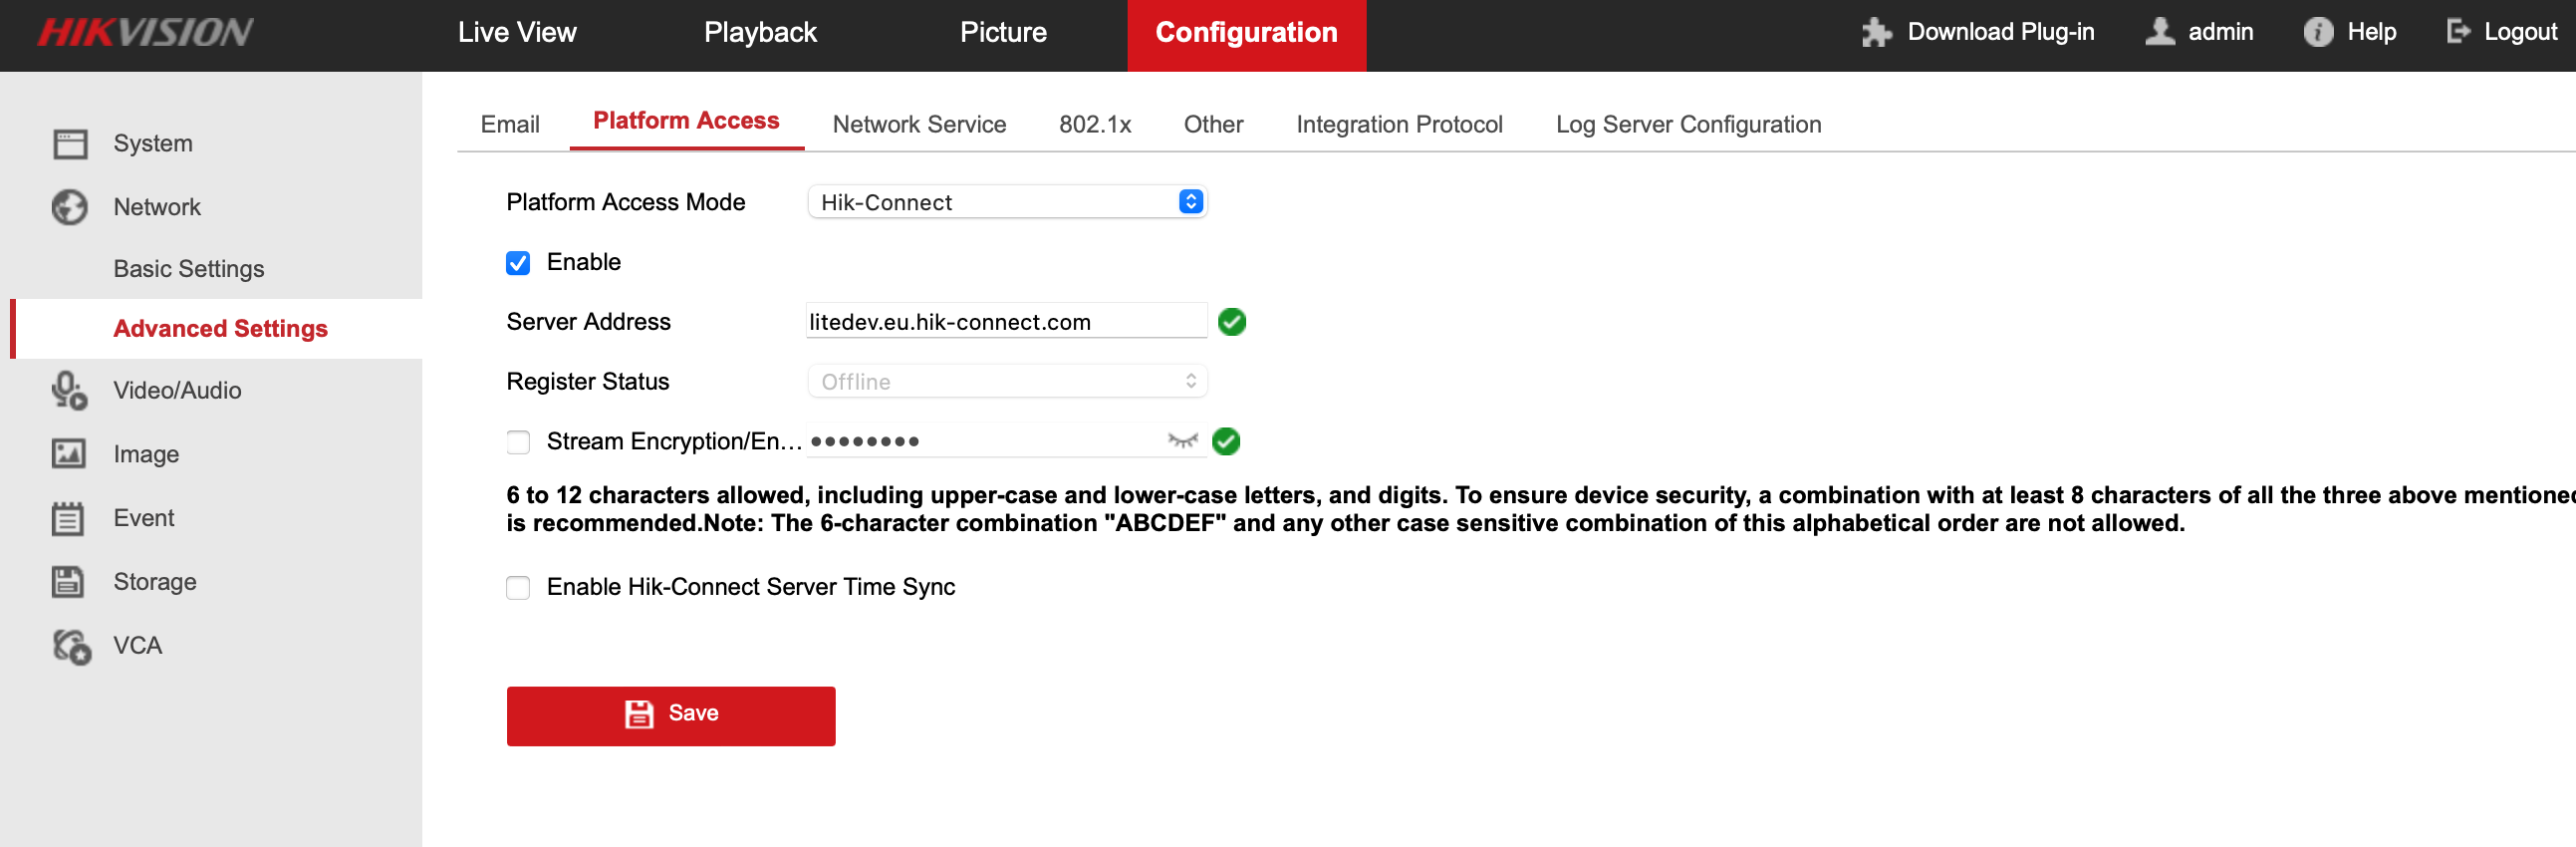
Disable Stream Encryption
Hik-Connect's stream encryption uses a proprietary mechanism not available to third parties. To use both platforms, disable stream encryption:
Create a tunnel to your Hikvision device
Log in to the camera web interface and navigate to Configuration → Network → Advanced Settings → Platform Access
Uncheck Stream Encryption/Encryption
Click Save
Tip: TetherX encrypts all streams when accessed through the TetherX platform or apps - your footage remains secure.
Warning: Some older Hikvision devices require a firmware update before the option to disable stream encryption appears. Certain budget models do not offer this setting at all - on these devices, you may need to disable Hik-Connect entirely to use the device with TetherX.
Troubleshooting
If you experience a broken stream or no live view after disabling stream encryption, update the camera or recorder firmware to the latest version. Hikvision has addressed known compatibility issues in recent firmware releases. See Updating Firmware Remotely below.
Updating Firmware Remotely
You can update Hikvision firmware remotely using TetherX's tunnelling feature, without travelling to site.
Tip: If your system was installed by a security installation partner, contact them to update your cameras.
Download Firmware
- Visit the Hikvision Downloads Page
- Search for your camera model
- Download the latest firmware for your region
- Extract the archive - it should contain a file named
digicap.dav
Warning: UK firmware is different from US firmware. Ensure you download the correct regional version.
Upload Firmware
Create a tunnel to your Hikvision device
Log in to the camera web interface and navigate to Configuration → Maintenance
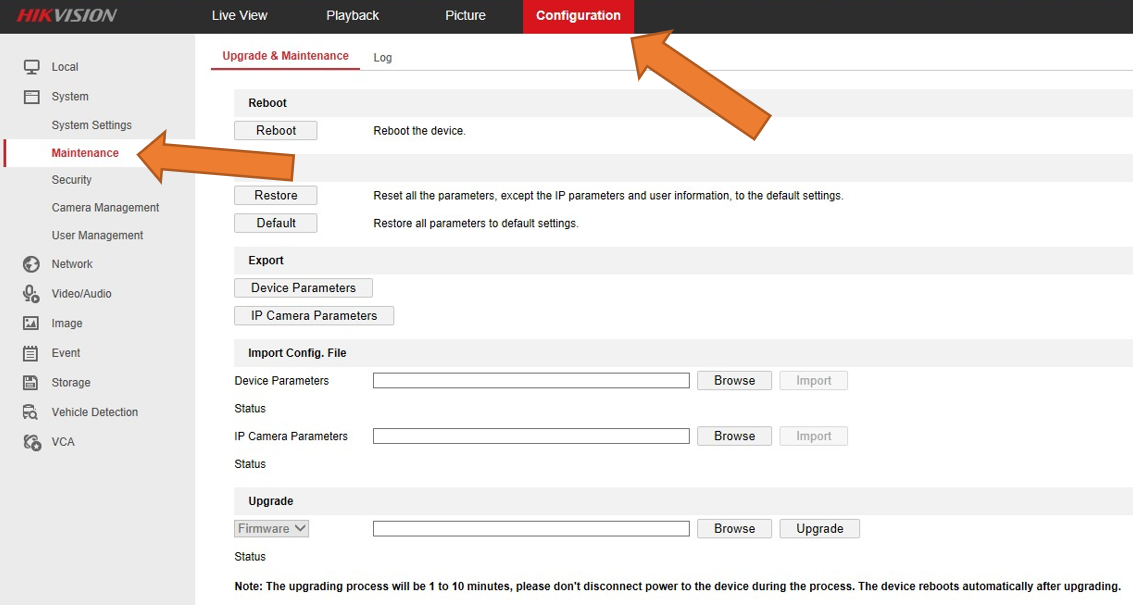
- Scroll to the Upgrade section and click Browse
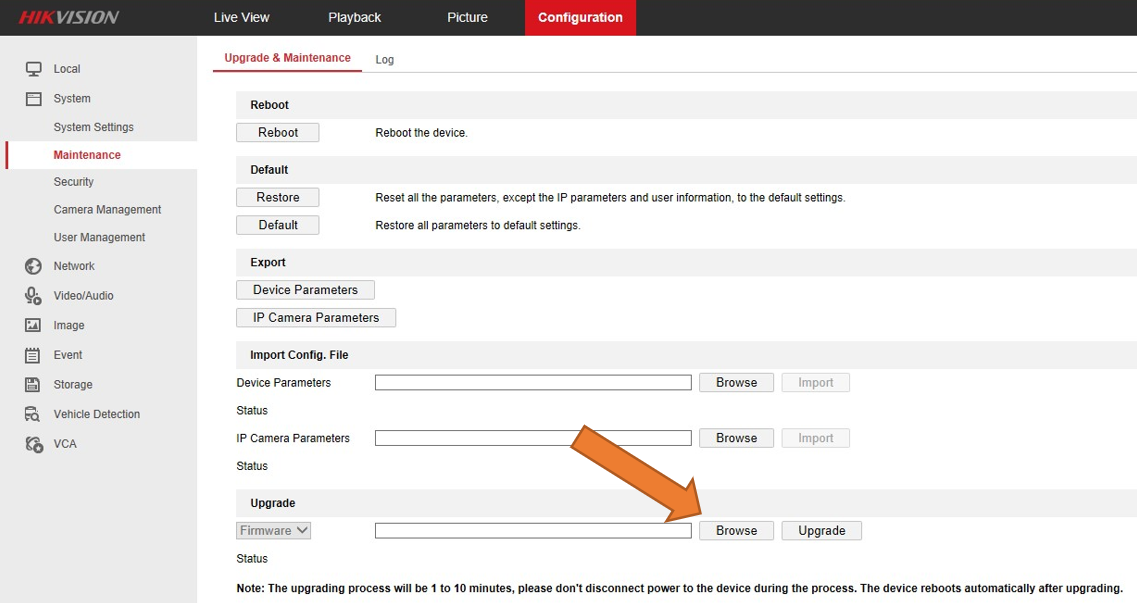
Select the
digicap.davfile you downloadedClick Upgrade
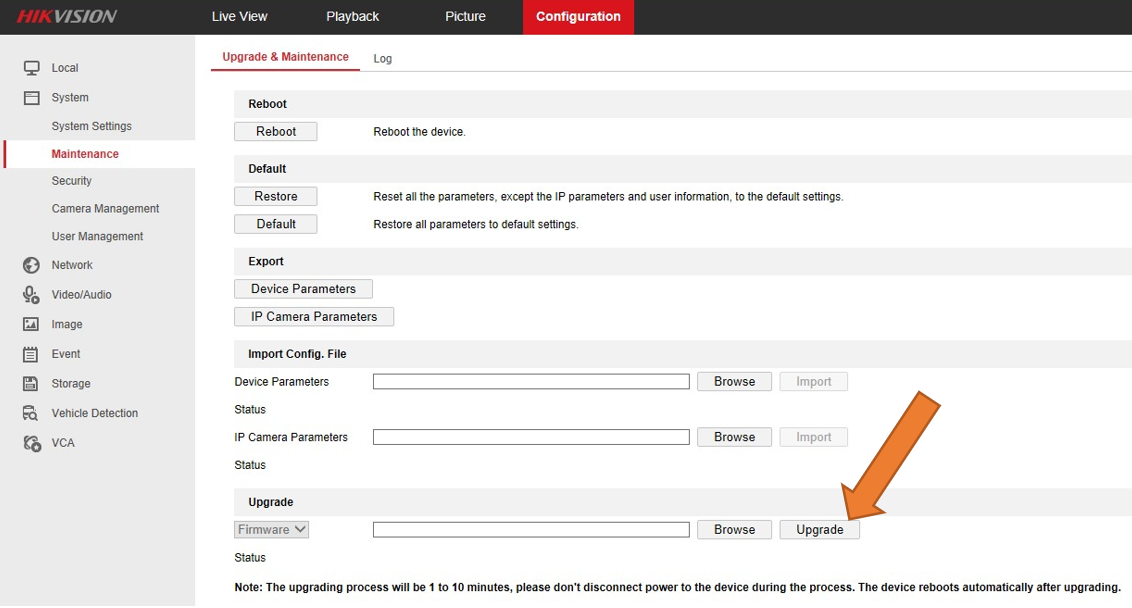
Warning: The upgrade takes up to 10 minutes. Do not disconnect power during the process. The device reboots automatically when complete.
Fisheye & 360° Cameras
Hikvision fisheye cameras offer multiple display modes. The double panorama view (single channel showing a split 180° view) is called 180 Panorama View:

Tip: Double panorama mode provides full coverage in a single channel, which is often the best balance between coverage and TetherBox channel usage.
See Fisheye & 360° Cameras for general fisheye configuration and dewarping options.
Referenced in: