Table of Contents
Camera Troubleshooting
Having trouble with your camera? This guide covers the most common issues and how to fix them.
Quick Diagnostics
First, check the basics:
- Is your camera showing as online in Admin → Cameras? (Check the "Last Seen" column)
- Are the credentials correct?
- Can you view the camera in Testing with VLC?
Tip: Most camera issues are caused by incorrect credentials, wrong stream URLs, or network connectivity problems. Work through each section below to diagnose the issue.
Camera is Offline
If your camera shows as offline in the Cameras page:
Check the network connection:
- Verify the camera is plugged into a PoE switch with power
- Test the Ethernet cable by connecting a laptop - does it get network access?
- Check the camera's power LED (refer to camera manual for LED meanings)
Check the IP address:
- Is the camera on the same network as your TetherBox?
- Try accessing the camera's web interface directly using its IP address
- Some cameras use static IPs - ensure it doesn't conflict with other devices
Warning: If the camera was working and suddenly went offline, check for power issues (faulty power supply, insufficient PoE wattage) or network changes (new router, network reconfiguration).
Camera is Online but Not Recording
If your camera is online but recordings are empty, several issues could be the cause:
Common causes:
- Incorrect credentials - camera is rejecting authentication
- Wrong stream URL - analytics stream may work but recording stream doesn't
- Invalid stream - camera firmware bug or hardware fault
- Outdated firmware - old buggy firmware can cause intermittent issues
- Resource limits - TetherBox CPU usage over 80% can cause temporary recording pauses
How to diagnose:
- Check if live view works in the TetherX platform
- Testing with VLC - test both streams independently
- Review TetherBox CPU usage in Admin → TetherBoxes
- Check camera firmware version (update if available)
Tip: VLC testing is the most important diagnostic step. See the full Testing with VLC guide for detailed instructions.
"Wrong Password" Error
This error means the camera is rejecting the username or password you've entered.
If you're sure credentials are correct:
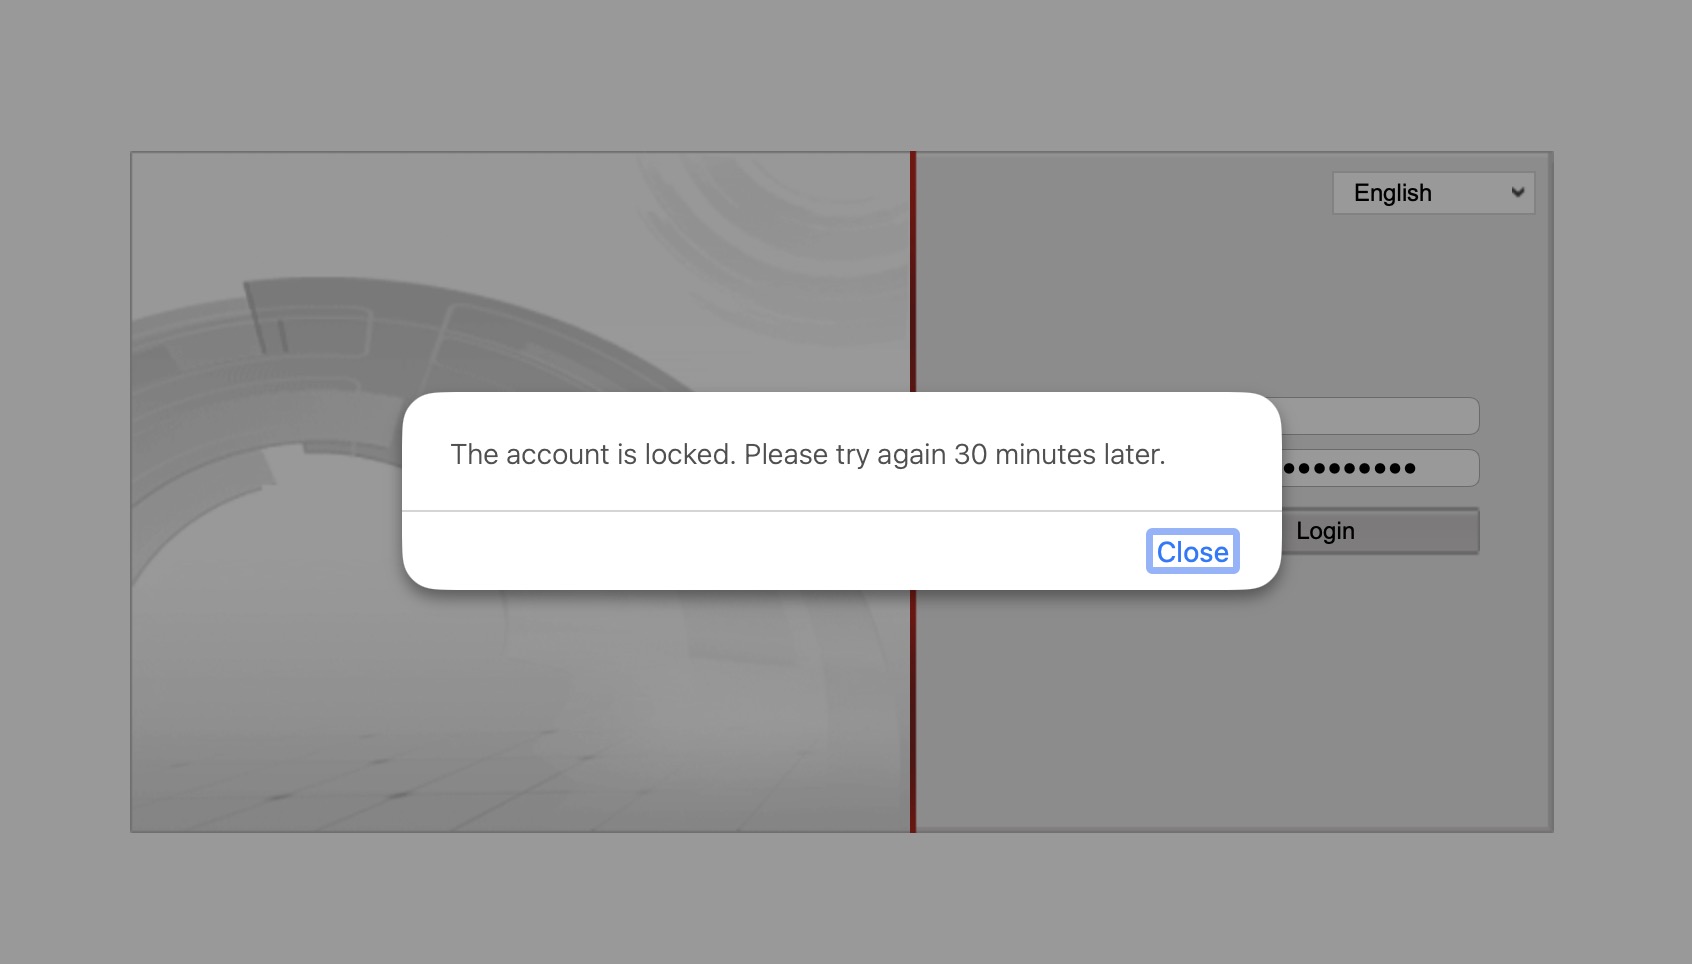
Use Tunnelling to access the camera's web interface directly and try logging in there. This helps confirm whether the camera has locked your account due to too many failed attempts:

If you see a lockout message like this, the camera is temporarily blocking login attempts. Try one of these:
- Wait it out - Disable the camera (set "Active" to "Off") and wait 60 minutes
- Restart the camera - Unplug it or reboot via its web interface
- Restart the PoE switch - Temporarily unplug power to reset all cameras
- Update the firmware - Some firmware versions have authentication bugs that are fixed in newer releases
Still not working?
Try resetting the camera to factory defaults (usually by holding a reset button for 5 seconds). Check your camera manual for reset instructions.
Tip: After resetting, you'll need to reconfigure the camera's network settings and set a new password.
Multiple Cameras on Same IP
Some manufacturers (Hikvision, Dahua) ship cameras with static IPs. This causes conflicts when multiple cameras are plugged in.
Check if cameras share an IP:
- Go to Admin → Cameras
- Look at the Access column (e.g.,
http://192.168.1.64) - If multiple cameras show the same IP, continue below
Fix the IP conflict:
- Unplug all cameras from the PoE switch
- Plug in one camera at a time
- Open the camera's IP in your browser (e.g.,
http://192.168.1.64) - Log in with default credentials (check camera manual)
- Go to Network settings
- Change from "Static IP" to "DHCP" or "Obtain IP automatically"
- Save and repeat for each camera
Tip: DHCP automatically assigns unique IPs to each camera, preventing conflicts.
Camera Keeps Dropping Off Network
If your camera periodically goes offline and comes back:
Cable issues:
- Bad cable - Internal damage causing intermittent shorts. Try replacing the cable.
- Cable too long - Ethernet cables have a 100m maximum length. Measure your run.
- Bad connectors - Poor crimping or damaged RJ45 connectors. Replace or re-crimp.
Power issues:
- Insufficient PoE wattage - Check if your switch provides enough power for the camera
- Overloaded switch - Too many cameras on one switch can cause power brownouts
Network issues:
- Faulty switch port - Try a different port or switch to isolate the problem
- HomePlug/Powerline adapters - Unreliable for surveillance. Use direct Ethernet.
- Wireless cameras - Weak signal or overloaded router. Check signal strength.
Camera issues:
- Overheating - Camera may shut down when too hot. Check ventilation.
- Faulty hardware - If nothing else works, the camera may need replacing.
Warning: HomePlug adapters are not recommended for video surveillance due to frequent connection drops and bandwidth limitations.
Need More Help?
If you've worked through this guide and still have issues:
- Submit a support request with camera make/model, error messages, and screenshots
- Include Testing with VLC results
- Provide TetherBox serial number and camera IP addresses
Referenced in: