

Table of Contents
Camera Masking
A camera pointed at a driveway also sees the road behind it, the tree over it and the neighbour's window. Every car and every branch is motion, and each one is an event somebody has to read.
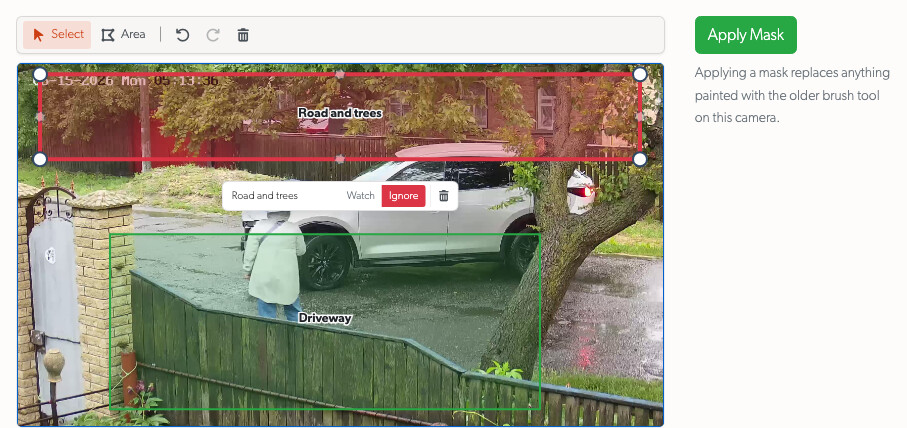
A mask tells the TetherBox which part of the picture matters. Draw the areas to watch, draw the areas to ignore, and press Apply Mask. Detection then answers for what you drew and stays quiet about the rest, which cuts false events and the recording they bring with them.
What a Mask Changes
A mask applies to TetherBox motion detection and TetherX AI: what triggers detection, what raises an event and what the AI is asked to look at. Ignored areas are masked and will not be monitored. Masked parts of the picture are still seen by the camera and still appear in footage you watch, so this is not a privacy blackout. To change the camera's own detection settings, open a tunnel to the camera and use its own interface.
Each area is one of two things:
- Watch - detection happens inside this area. Once any area is set to Watch, everything outside every watched area is ignored, which is how "only the forecourt matters" is said in one shape.
- Ignore - detection stops inside this area. Use it for a road, a tree, a flag, a neighbouring doorway, or a patch of sky.
The two mix. Watch the driveway, then ignore the strip of road that shows through the gate, and the camera answers for the driveway minus that strip.
Drawing a Mask
- Go to Admin → Cameras
- Select the camera and open the Mask tab
- The picture is a live still from that camera, so you draw over what it is seeing now
- With Area chosen, tap a corner at a time around the part you mean
- Press Finish, or tap the first corner again, to close the shape
A camera with no mask yet opens on the Area tool, because drawing is the only thing there is to do on an empty picture. Select is for working on shapes you have already drawn.
Changing a shape:
- Drag the middle of a shape to move it
- Drag a corner to reshape it
- Tap the faint point on an edge to add a corner there
- Tap a corner, then press the minus button above the shape, to remove that corner
- Undo and Redo step through every edit, including naming and Watch or Ignore
- The bin in the toolbar clears the whole picture
Naming an Area and Choosing What It Does
Selecting a shape puts its controls directly above it: a name field, the Watch and Ignore choice, and a bin that deletes that one shape.
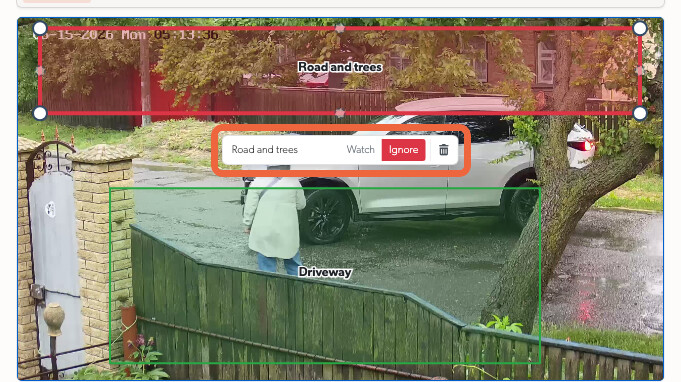
Type a name and press Enter. The name is then drawn on the picture, so a camera carrying four areas can be read at a glance without selecting each one. Names are for the people who come after you: "Road and trees" tells the next engineer why that shape is there, where an unnamed red box does not.
Tip: Name anything you would have to explain. An area covering a neighbour's window is worth naming for the reason it exists.
Applying the Mask
Nothing reaches the camera until you press Apply Mask.
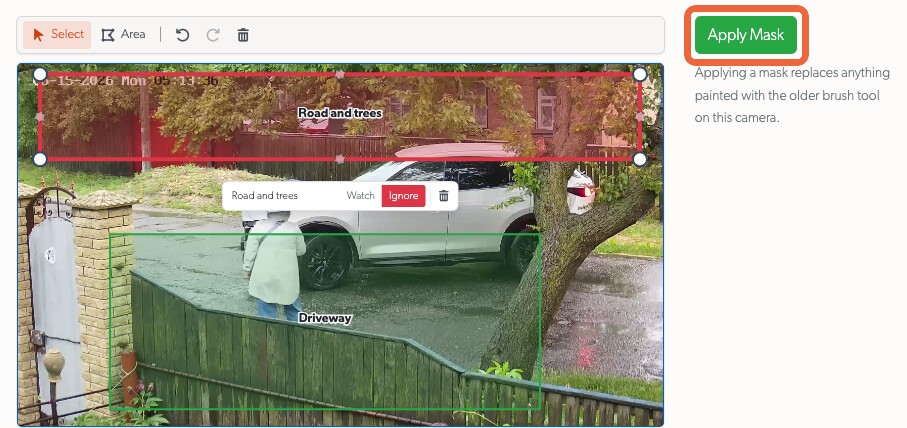
The mask goes to the TetherBox, which turns the areas into the form its detection reads and loads it straight away. The camera keeps recording while that happens. If the TetherBox cannot confirm the change in place, it restarts that camera's recording to be sure the new mask is in force, which takes a few seconds.
Keep editing afterwards and the button comes back to life: each press sends whatever is on screen at that moment, so the last thing you applied is what the camera is running.
To remove a mask completely, clear the picture with the toolbar bin and press Apply Mask again. The camera then detects across the whole frame.
Warning: Applying a mask replaces anything painted with the older brush tool on that camera. The two do not merge.
What to Mask
- Roads and pavements past your boundary. The single biggest source of false events on a front-facing camera.
- Trees, hedges and flags. Wind moves them all day and night.
- Sky and bright reflections, which change with the weather rather than with anything happening on site.
- A neighbour's property, where recording it is neither wanted nor useful.
- Screens and displays inside a building, which repaint constantly.
Masking also protects recording capacity: detection that does not fire does not record, so a camera that used to answer for a busy road keeps its storage for what happens on site. TetherBox Recording Capacity covers the rest of the ways to stretch it.
Related Articles
Reducing False Notifications - The full set of filters, of which masking is the first. TetherBox Recording Capacity - What masking saves, and what else buys capacity. Camera Notification Settings - Who hears about an event once detection has raised it.
Referenced in: